How to Setup Custom Fonts with CSS & @font-face
November 19, 2019
In this post, I’m going to show you step by step how to set up custom fonts on your website in CSS using @font-face.
Ready? Let’s dive in:
- Step 1: Get all the font files you need for cross-browser support
- Step 2: Add the font files to your project
- Step 3: Use @font-face in CSS to leverage the font files
- Step 4 (Optional): Using multiple custom fonts
- Step 5: Don’t forget about font-display
- Step 6: Styling your typography with CSS
Here’s a video, if you prefer to watch instead of read:
Step 1: Get all the font files you need for cross-browser support
To meet the best cross-browser standards, you’ll need 5 specific font file extensions of your custom font added to your project.
In fact, here are the 5 file extensions you’ll need:
- .eot
- .woff2
- .woff
- .ttf
- .svg
If you have all of these font file extensions already, then you can skip straight ahead to step 2.
But what if you don’t have all the font-file extensions?
Thankfully, solving this problem is quick and easy.
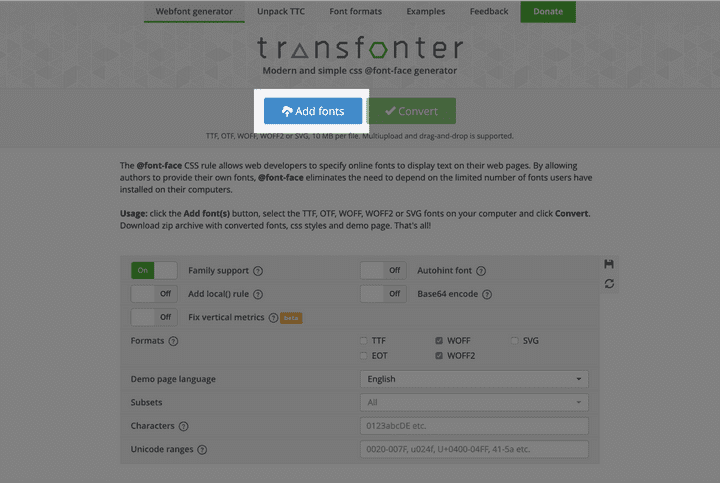
Just head over to a free font generator (I like to use Transfonter), and upload your font files there.
For example, on the Transfonter website, press the Add fonts button:
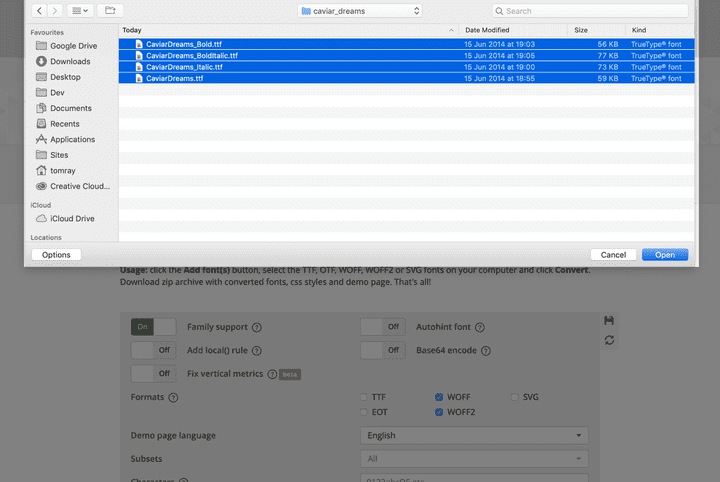
Select the font files to upload (note here that I’ve uploaded the regular, italic, bold and bold italic as I want to use these in my project):
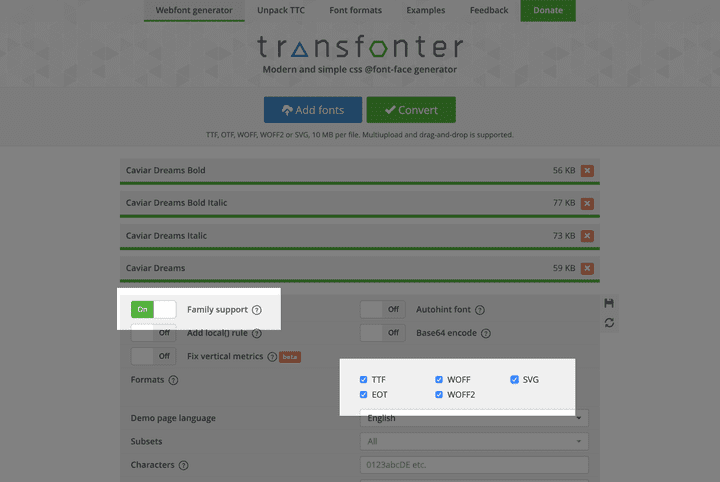
Make sure you have all the font formats selected, and leave the “Family support” option to on:
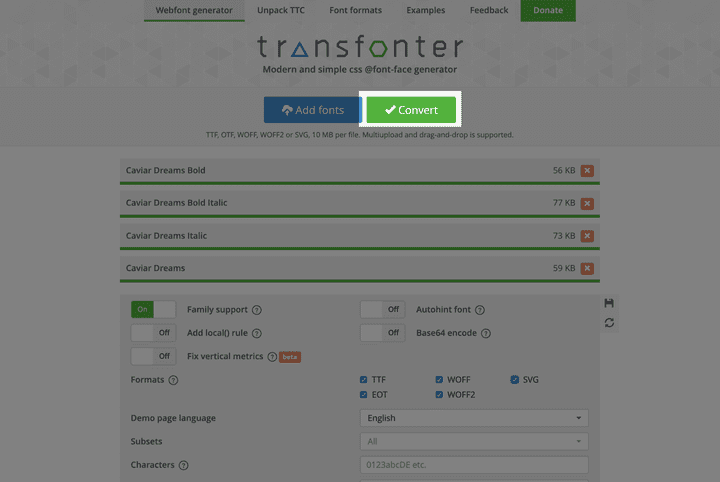
Finally, press the Convert button and download:
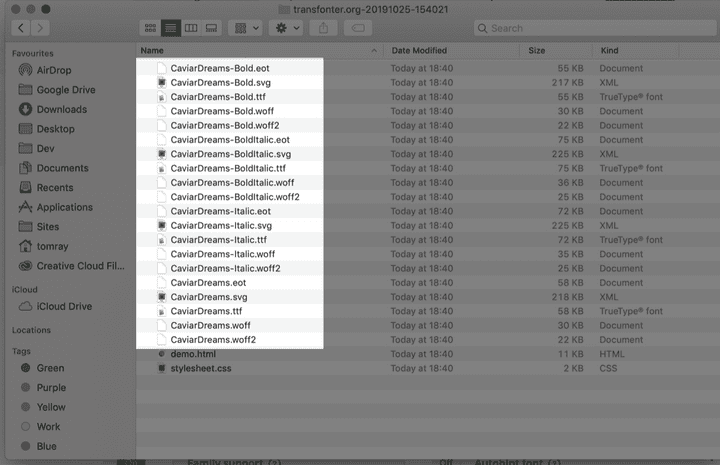
Here’s how mine looks, various font weights and styles with different file extensions:
Awesome! Now you’ve got all the font files, we can start to add the custom font to our project.
Step 2: Add the font files to your project
You might be thinking: where do I put all the font files?
Is there a specific folder I should be using?
The answer:
It depends on the structure of your project. It’s pretty difficult to go wrong though.
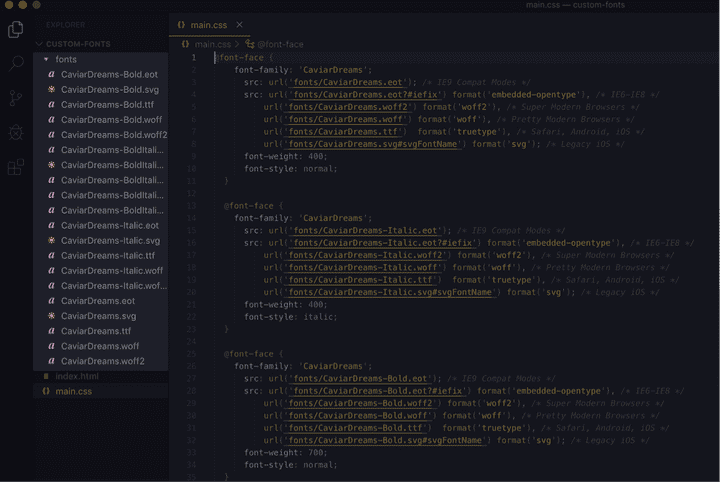
As you will likely have quite a few font files, my recommendation would be to place all of the font files in a folder called “Fonts”, like this:
Groovy! With all the font files added to your project, it’s time to use @font-face…
Step 3: Use @font-face in CSS to leverage the font files
Your font files are now in your project. It’s time to write some CSS so the font is available for you to style the typography!
Open your CSS file (or preprocessor file) and drop in a @font-face declaration, like this:
@font-face {font-family: 'CaviarDreams';src: url('fonts/CaviarDreams.eot'); /* IE9 Compat Modes */src: url('fonts/CaviarDreams.eot?#iefix') format('embedded-opentype'), /* IE6-IE8 */url('fonts/CaviarDreams.woff2') format('woff2'), /* Super Modern Browsers */url('fonts/CaviarDreams.woff') format('woff'), /* Pretty Modern Browsers */url('fonts/CaviarDreams.ttf') format('truetype'), /* Safari, Android, iOS */url('fonts/CaviarDreams.svg#svgFontName') format('svg'); /* Legacy iOS */font-weight: 400;font-style: normal;}
You’ll need to swap out the font-family CaviarDreams with the name of your custom font.
You’ll also need to change the value referenced inside each url() so that it references the location of the font (where you placed the font files in your project. See step 2 above)
The example above only covers 1 font family, 1 font weight, and 1 font style.
What about multiple font weights like semi-bold or light? Or the italic version of each font weight?
For that, you’ll simply need to add more @font-face declarations:
@font-face {font-family: 'CaviarDreams';src: url('fonts/CaviarDreams.eot'); /* IE9 Compat Modes */src: url('fonts/CaviarDreams.eot?#iefix') format('embedded-opentype'), /* IE6-IE8 */url('fonts/CaviarDreams.woff2') format('woff2'), /* Super Modern Browsers */url('fonts/CaviarDreams.woff') format('woff'), /* Pretty Modern Browsers */url('fonts/CaviarDreams.ttf') format('truetype'), /* Safari, Android, iOS */url('fonts/CaviarDreams.svg#svgFontName') format('svg'); /* Legacy iOS */font-weight: 400;font-style: normal;}@font-face {font-family: 'CaviarDreams';src: url('fonts/CaviarDreams-Italic.eot'); /* IE9 Compat Modes */src: url('fonts/CaviarDreams-Italic.eot?#iefix') format('embedded-opentype'), /* IE6-IE8 */url('fonts/CaviarDreams-Italic.woff2') format('woff2'), /* Super Modern Browsers */url('fonts/CaviarDreams-Italic.woff') format('woff'), /* Pretty Modern Browsers */url('fonts/CaviarDreams-Italic.ttf') format('truetype'), /* Safari, Android, iOS */url('fonts/CaviarDreams-Italic.svg#svgFontName') format('svg'); /* Legacy iOS */font-weight: 400;font-style: italic;}@font-face {font-family: 'CaviarDreams';src: url('fonts/CaviarDreams-Bold.eot'); /* IE9 Compat Modes */src: url('fonts/CaviarDreams-Bold.eot?#iefix') format('embedded-opentype'), /* IE6-IE8 */url('fonts/CaviarDreams-Bold.woff2') format('woff2'), /* Super Modern Browsers */url('fonts/CaviarDreams-Bold.woff') format('woff'), /* Pretty Modern Browsers */url('fonts/CaviarDreams-Bold.ttf') format('truetype'), /* Safari, Android, iOS */url('fonts/CaviarDreams-Bold.svg#svgFontName') format('svg'); /* Legacy iOS */font-weight: 700;font-style: normal;}@font-face {font-family: 'CaviarDreams';src: url('fonts/CaviarDreams-BoldItalic.eot'); /* IE9 Compat Modes */src: url('fonts/CaviarDreams-BoldItalic.eot?#iefix') format('embedded-opentype'), /* IE6-IE8 */url('fonts/CaviarDreams-BoldItalic.woff2') format('woff2'), /* Super Modern Browsers */url('fonts/CaviarDreams-BoldItalic.woff') format('woff'), /* Pretty Modern Browsers */url('fonts/CaviarDreams-BoldItalic.ttf') format('truetype'), /* Safari, Android, iOS */url('fonts/CaviarDreams-BoldItalic.svg#svgFontName') format('svg'); /* Legacy iOS */font-weight: 700;font-style: italic;}
As you can see, this code can get pretty long pretty quickly.
For those leveraging a CSS preprocessor like Sass, creating your own mixin to solve for this could be an option.
Note in the above CSS example that the font-weight and the font-style are adjusted for each @font-face declaration to match the font file being referenced.
For example, the CaviarDreams-BoldItalic font file has a font-weight of 700 and font-style is italic.
As a standard, font-weight: regular is the same as font-weight: 400 and font-weight: bold is the same as font-weight: 700
You may want to add font-weights like “Ultra Light” or “Black”. For these, you’ll need to look into the documentation of your font so you can match the font files with the correct font-weight number.
Step 4 (Optional): Using multiple custom fonts
You might be thinking… What do I do if I have more than 1 custom font?
For example, if I wanted to add the font Caviar Dreams AND the font Gilroy to my project.
For that, you’ll simply need to add more @font-face decelerations:
@font-face {font-family: 'CaviarDreams';... /* Snippet shortened for this example */font-weight: 400;font-style: normal;}@font-face {font-family: 'CaviarDreams';... /* Snippet shortened for this example */font-weight: 400;font-style: italic;}@font-face {font-family: 'CaviarDreams';... /* Snippet shortened for this example */font-weight: 700;font-style: normal;}@font-face {font-family: 'CaviarDreams';... /* Snippet shortened for this example */font-weight: 700;font-style: italic;}@font-face {font-family: 'Gilroy';src: url('fonts/Gilroy.eot'); /* IE9 Compat Modes */src: url('fonts/Gilroy.eot?#iefix') format('embedded-opentype'), /* IE6-IE8 */url('fonts/Gilroy.woff2') format('woff2'), /* Super Modern Browsers */url('fonts/Gilroy.woff') format('woff'), /* Pretty Modern Browsers */url('fonts/Gilroy.ttf') format('truetype'), /* Safari, Android, iOS */url('fonts/Gilroy.svg#svgFontName') format('svg'); /* Legacy iOS */font-weight: 400;font-style: normal;}@font-face {font-family: 'Gilroy';src: url('fonts/Gilroy-Italic.eot'); /* IE9 Compat Modes */src: url('fonts/Gilroy-Italic.eot?#iefix') format('embedded-opentype'), /* IE6-IE8 */url('fonts/Gilroy-Italic.woff2') format('woff2'), /* Super Modern Browsers */url('fonts/Gilroy-Italic.woff') format('woff'), /* Pretty Modern Browsers */url('fonts/Gilroy-Italic.ttf') format('truetype'), /* Safari, Android, iOS */url('fonts/Gilroy-Italic.svg#svgFontName') format('svg'); /* Legacy iOS */font-weight: 400;font-style: italic;}
Step 5: Don’t forget about font-display
A quick note on performance.
Fairly recently, a new descriptor was added for @font-face called font-display.
This lets you decide how your web font will render depending on how long the fonts take to load.
To work with font-display, you need to add it to each of your @font-face declarations:
@font-face {font-family: 'CaviarDreams';src: url('fonts/CaviarDreams.eot'); /* IE9 Compat Modes */src: url('fonts/CaviarDreams.eot?#iefix') format('embedded-opentype'), /* IE6-IE8 */url('fonts/CaviarDreams.woff2') format('woff2'), /* Super Modern Browsers */url('fonts/CaviarDreams.woff') format('woff'), /* Pretty Modern Browsers */url('fonts/CaviarDreams.ttf') format('truetype'), /* Safari, Android, iOS */url('fonts/CaviarDreams.svg#svgFontName') format('svg'); /* Legacy iOS */font-weight: 400;font-style: normal;font-display: swap;}
The value you choose for font-display is of course up to you.
I typically tend to go with font-display: swap, as this shows the font fallback option when the custom font is loading.
Using font-display: swap will mean there will always be a font shown to the user (i.e. they’ll never see a blank screen while the fonts load).
Take a look at this example on the BBC Sport website, who use font-display: swap:
(Note how the when the page loads, the font initially uses the fallback option Arial before loading their custom font ReithSans)

For a deeper dive into each of the font-display values, I’d recommend checking this article out from the Google Developers site.
Step 6: Styling your typography with CSS
We’re almost there!
So far we’ve added the cross-browser font files to our project, written out @font-face decelerations to reference our custom font files, and now it’s time to leverage the custom font into our typography.
By adding the @font-face declarations above, you’ve essentially added a new font that you can use when declaring font-family in your CSS.
For example, let’s say that I want all of the typography on my website to use the CaviarDreams font I added above with @font-face.
I would just need to add the following CSS to my project:
body {font-family: CaviarDreams, Helvetica;}
Note that I’ve added Helvetica as a fallback font. This will be leveraged when the page is slow to load, as I added font-display: swap in step 5 above.
And that’s it!
You now have custom fonts set up on your project 💪.
Want to become an advanced CSS & Sass developer?
Levelling up your CSS & Sass skills in 2021 is a great idea. Here's why:
- Increase your employability and value as a front-end developer
- Learn how to style your websites and applications in clean, efficient code
- Use tooling and techniques like BEM, flexbox, grid & more to improve your code
